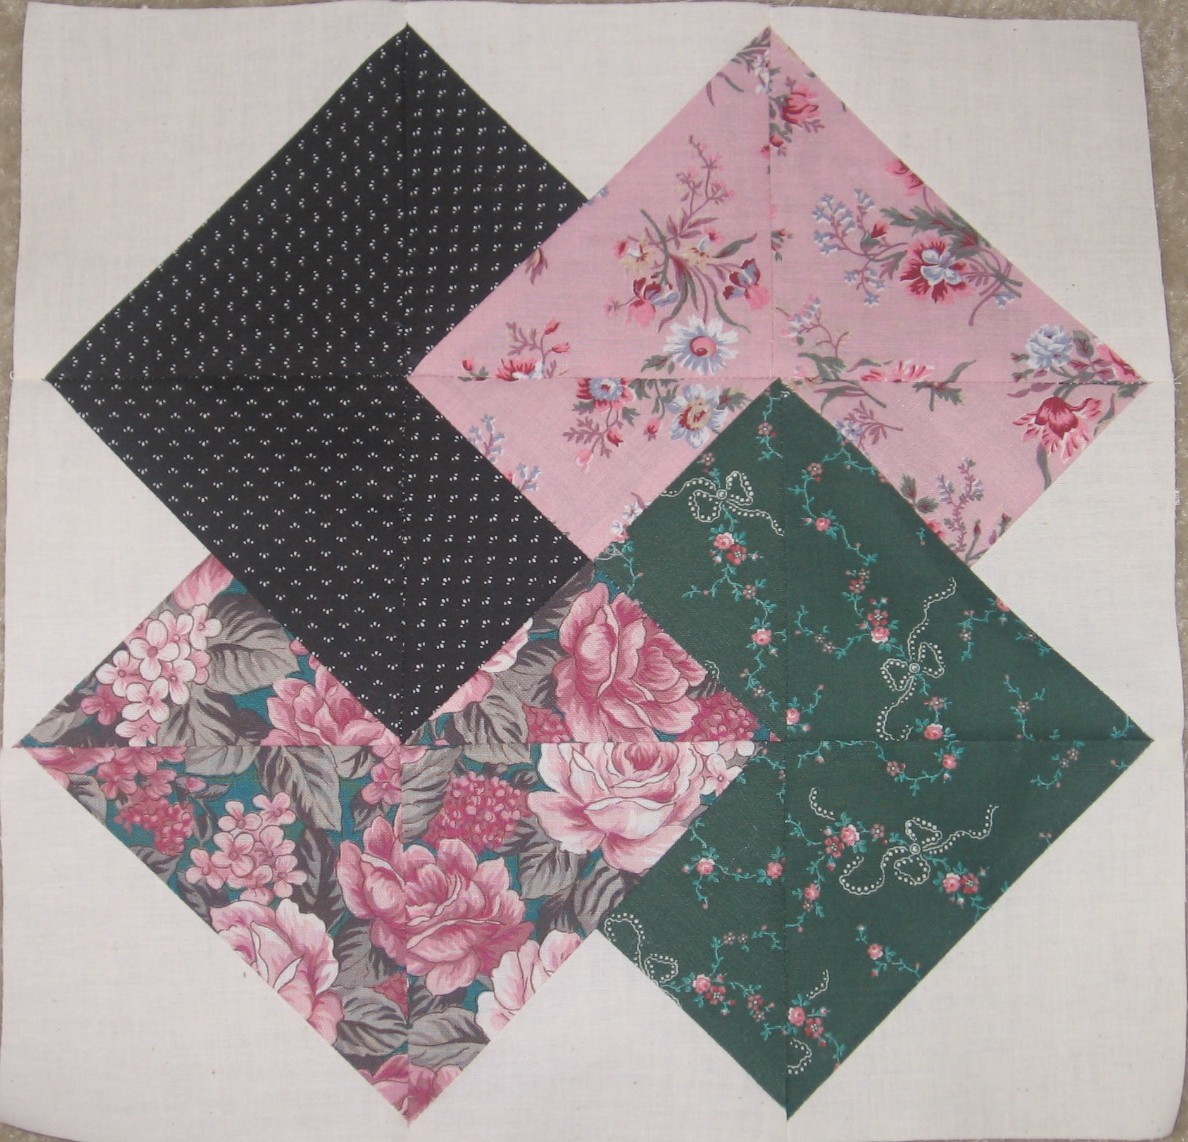
This block looks like a 4 patch, but it's really a 9 patch. You will need 4 fabrics and a background. The trick is that a lot of seams are on the bias, so be careful not to stretch the edges!

Cutting Directions:
Background fabric: (2) 5" squares cut once along the diagonal and (1) 5 3/8" square cut twice, once along each diagonal
Fabrics A, B, C, D: (1) 5" square cut once along the diagonal and (1) 3 7/8" square cut along the diagonal. These end up the same size as the 5 3/8" square cut on both diagonals.
Sewing Directions:
1. Lay all the pieces out according to the picture. It doesn't matter where each fabric is, only that all the pieces are in the right arrangement. You will notice that my block rotates by 90* in future pictures, I got confused trying to put sections back and ended up rotating the block. I didn't realize it until I posted the pictures.
2. Start sewing the pieces together, starting with the smallest triangles. Sew the center triangles and the smaller ones in the sides. Press all the seams to one side, making sure with the center ones that you press in opposite directions so they lay together nicely.
Hint: I found it easiest to place right sides together in the square and then gather the pairs into a pile with the edge I was to sew on the right, so they were all the same direction at the sewing machine.

3. Place the sewn triangles back in the square in the right positions. Make sure you have four squares! Then sew the half square triangles together. I also sewed the center together at this point. Press to the darker fabric. Put them back in the design again so you have rows laid out.
You will need to square each piece so that they all measure 4 1/2". Some of mine were 4 3/4", so they really need trimming. Make sure to keep the center in the middle.
4. Sew each row together and press the seams to one side. Make sure the center row is pressed in the opposite direction as the outer rows.


5. Then sew the rows together, press the final seams, and you are done!