 For my first block, I chose an Ohio Star Variation. I'm sure there's a specific name for thise block, but I don't know what it is. I love star blocks and the Ohio Star is one of my favorite traditional blocks.
Fabric requirements:
Fabric A: (1) 4 1/2 inch square (center)
Fabric B: (2) 5 inch squares and (1) 5 3/8 inch square
Fabric C: (2) 5 3/8 inch squares (star points)
Background/muslin: (2) 5 inch squares and (1) 5 3/8 inch square
Directions:
1. Cut out the center block, cut dimensions are 4 1/2 inches square, then set it aside.
2. Cut out the corner pieces next, two of the background and two of Fabric B. All squares should be cut 5 inches. Mark a diagonal line from corner to corner on the background (or light colored) squares.
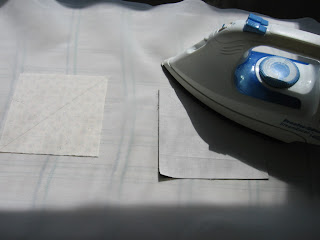
Press a background square to a B fabric square with right sides together and edges lined up. This helps the fabric stay together without pins.
3. Cut the pieces for the star points. From Fabric C cut two squares, Fabric B one square, and background one square. All the squares should be cut 5 3/8 inches. On Fabric B and background squares, draw a diagonal line (same as before).
Press a background square and C fabric same as above, also press B and C fabrics together.
4. Sewing time!!There are now 4 pairs of squares pressed together with a diagonal line drawn across the light colored square. Sew a scant 1/4 inch seam allowance on both sides of the line. Repeat for all 4 sets of blocks.
5. With rotary cutter, cut the 5 3/8 inch blocks on the opposite diagonal as the one just sewn. These are the squares with Fabrics C, B, and background.
 Yes, cut it the wrong direction. It will turn out, I promise! Next, using scissors, cut along the drawn line.
6. Press open with the seam allowance under the dark fabric. Lay out triangles according to the pattern. Sew along diagonal line. There will be two squares with a right-hand diagonal and two with a left-hand diagonal. Press the new seam to one side. It doesn't matter which side, but try to keep consistent (always press to background or toward the print).
7. Back to the corner squares, the Fabric B and background. Cut those along the drawn diagonal line. I think it's easier to do with scissors rather than rotary cutter. Press the seam allowance under the darker fabric (on my block it's the print).8. All the squares that we have sewn need to be squared and trimmed. There is a little extra in my measurements to allow for this (about 1/8 inch). I line up the diagonal line and straight edges with the markings on my ruler and trim off the extra. Make sure the squares are 4 1/2 inches!
Then sew the rows together and it's done!!!!


No comments:
Post a Comment